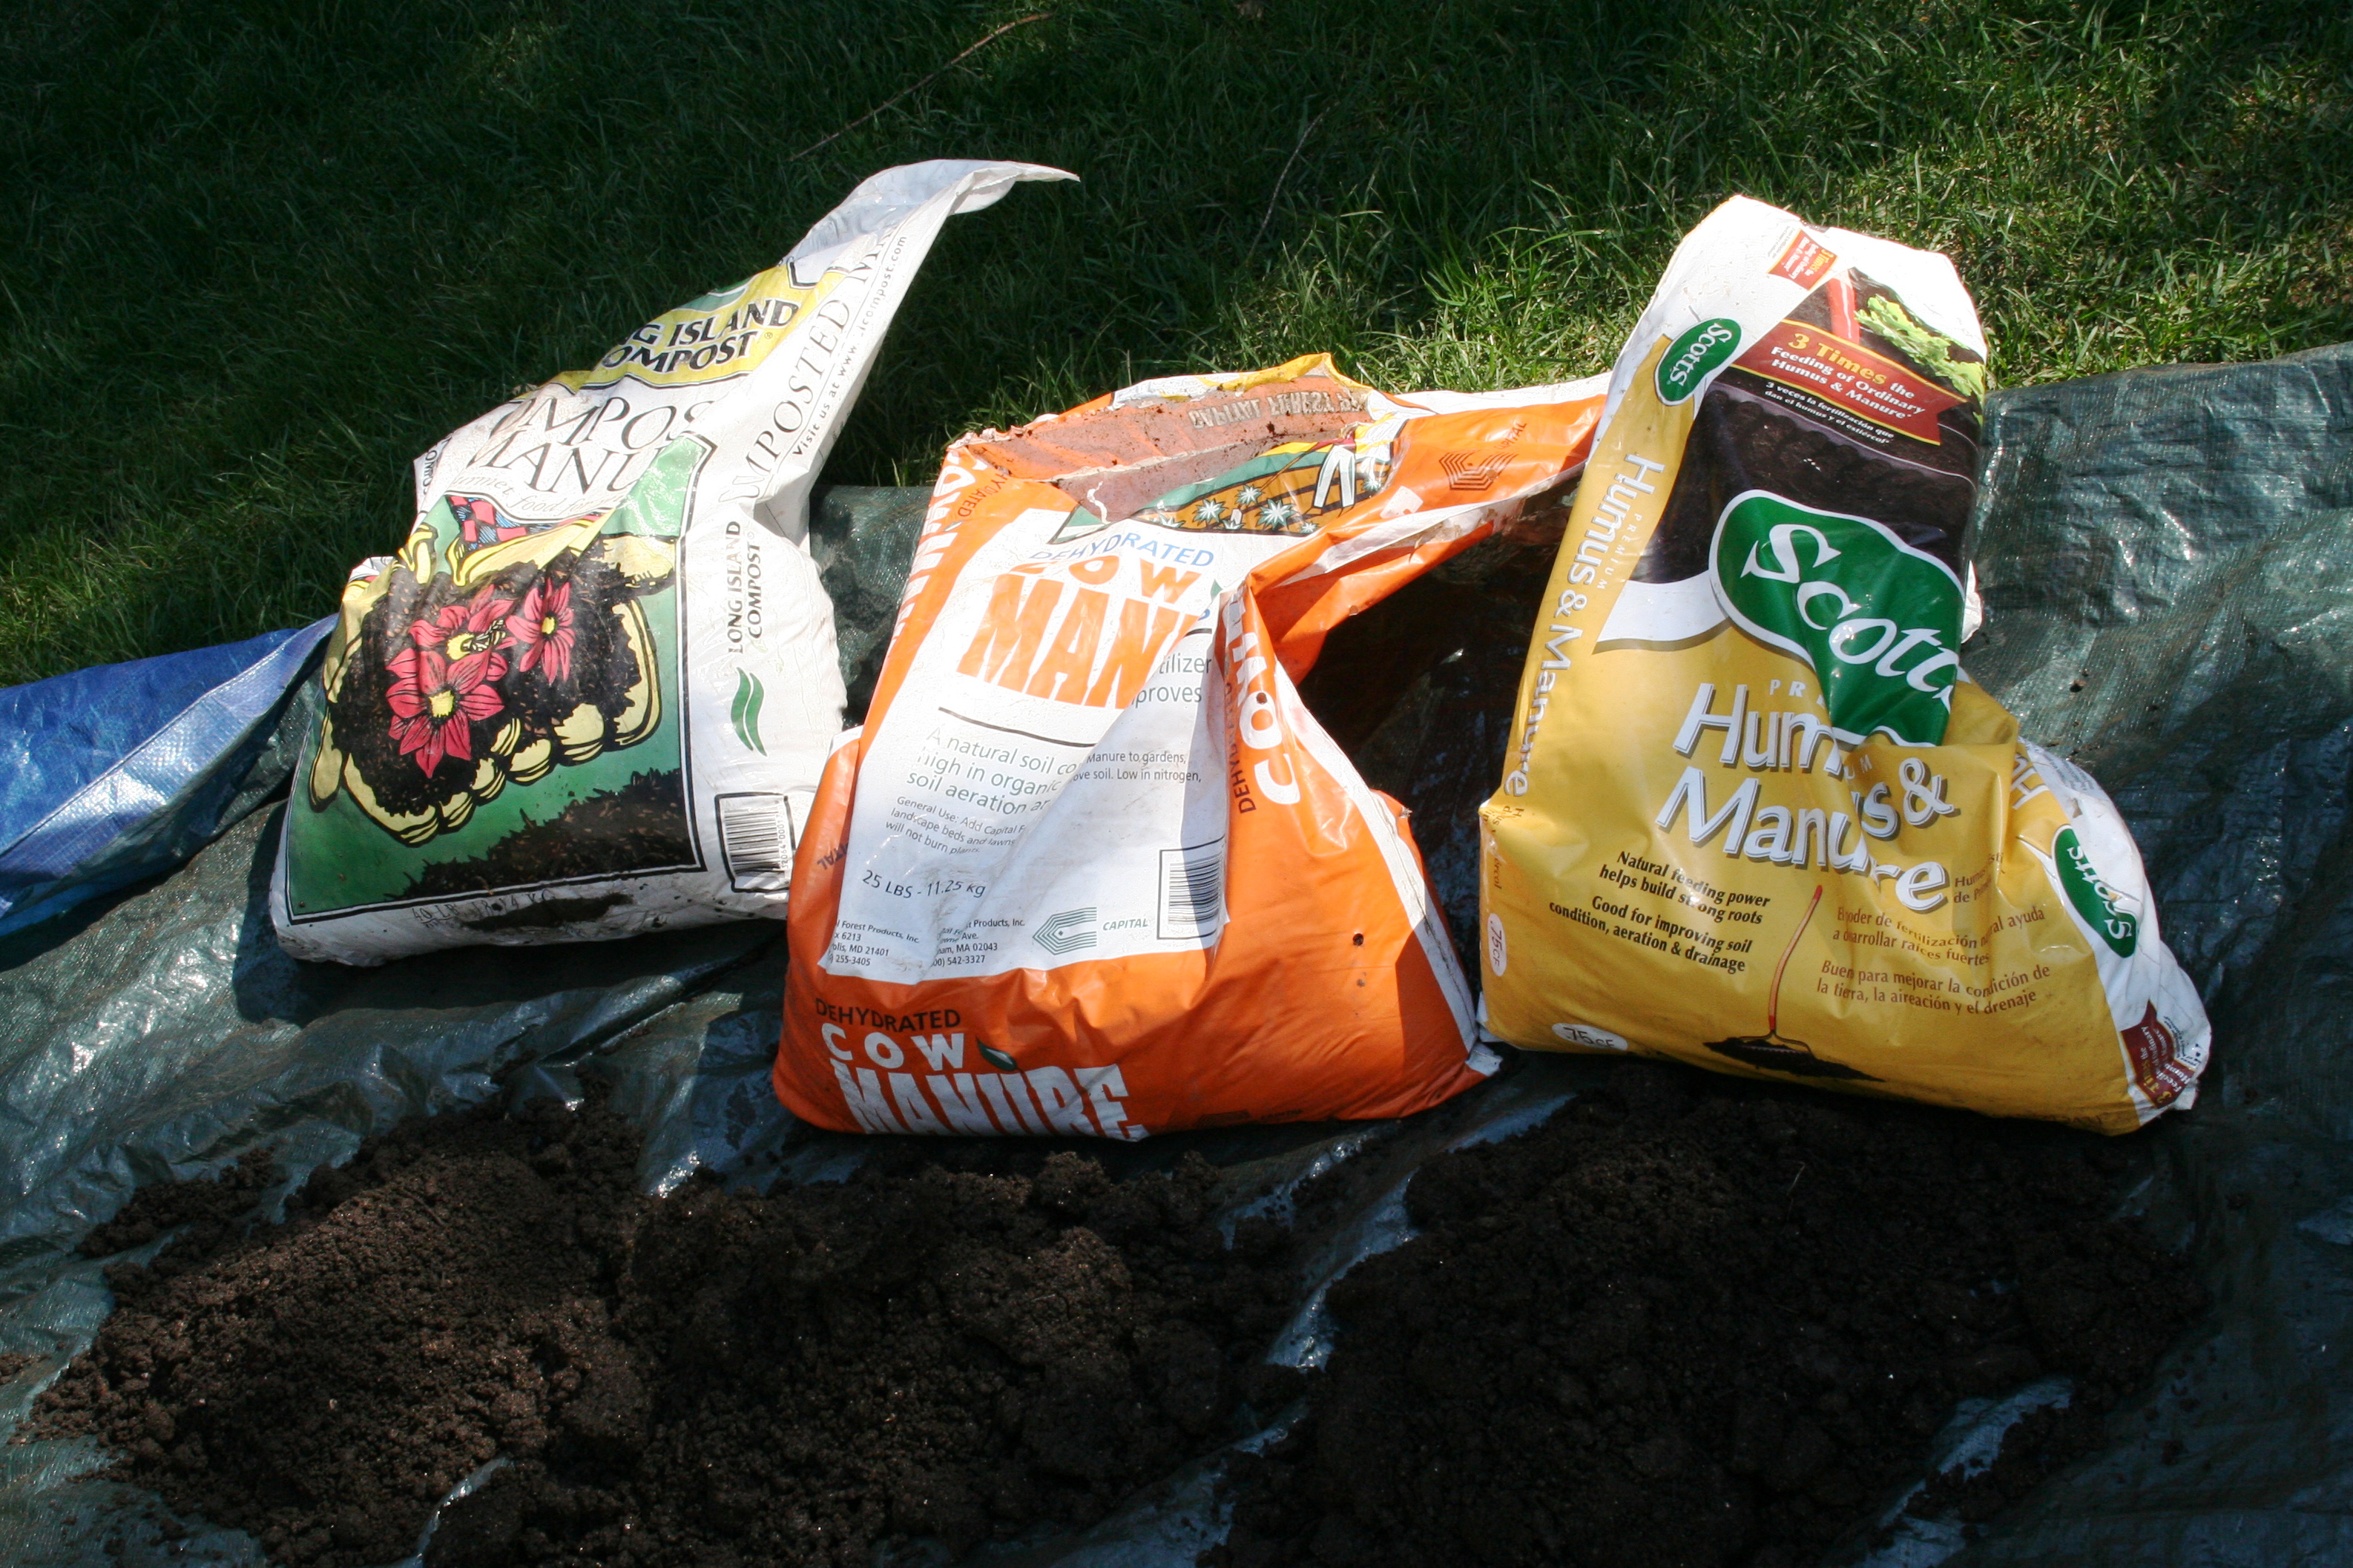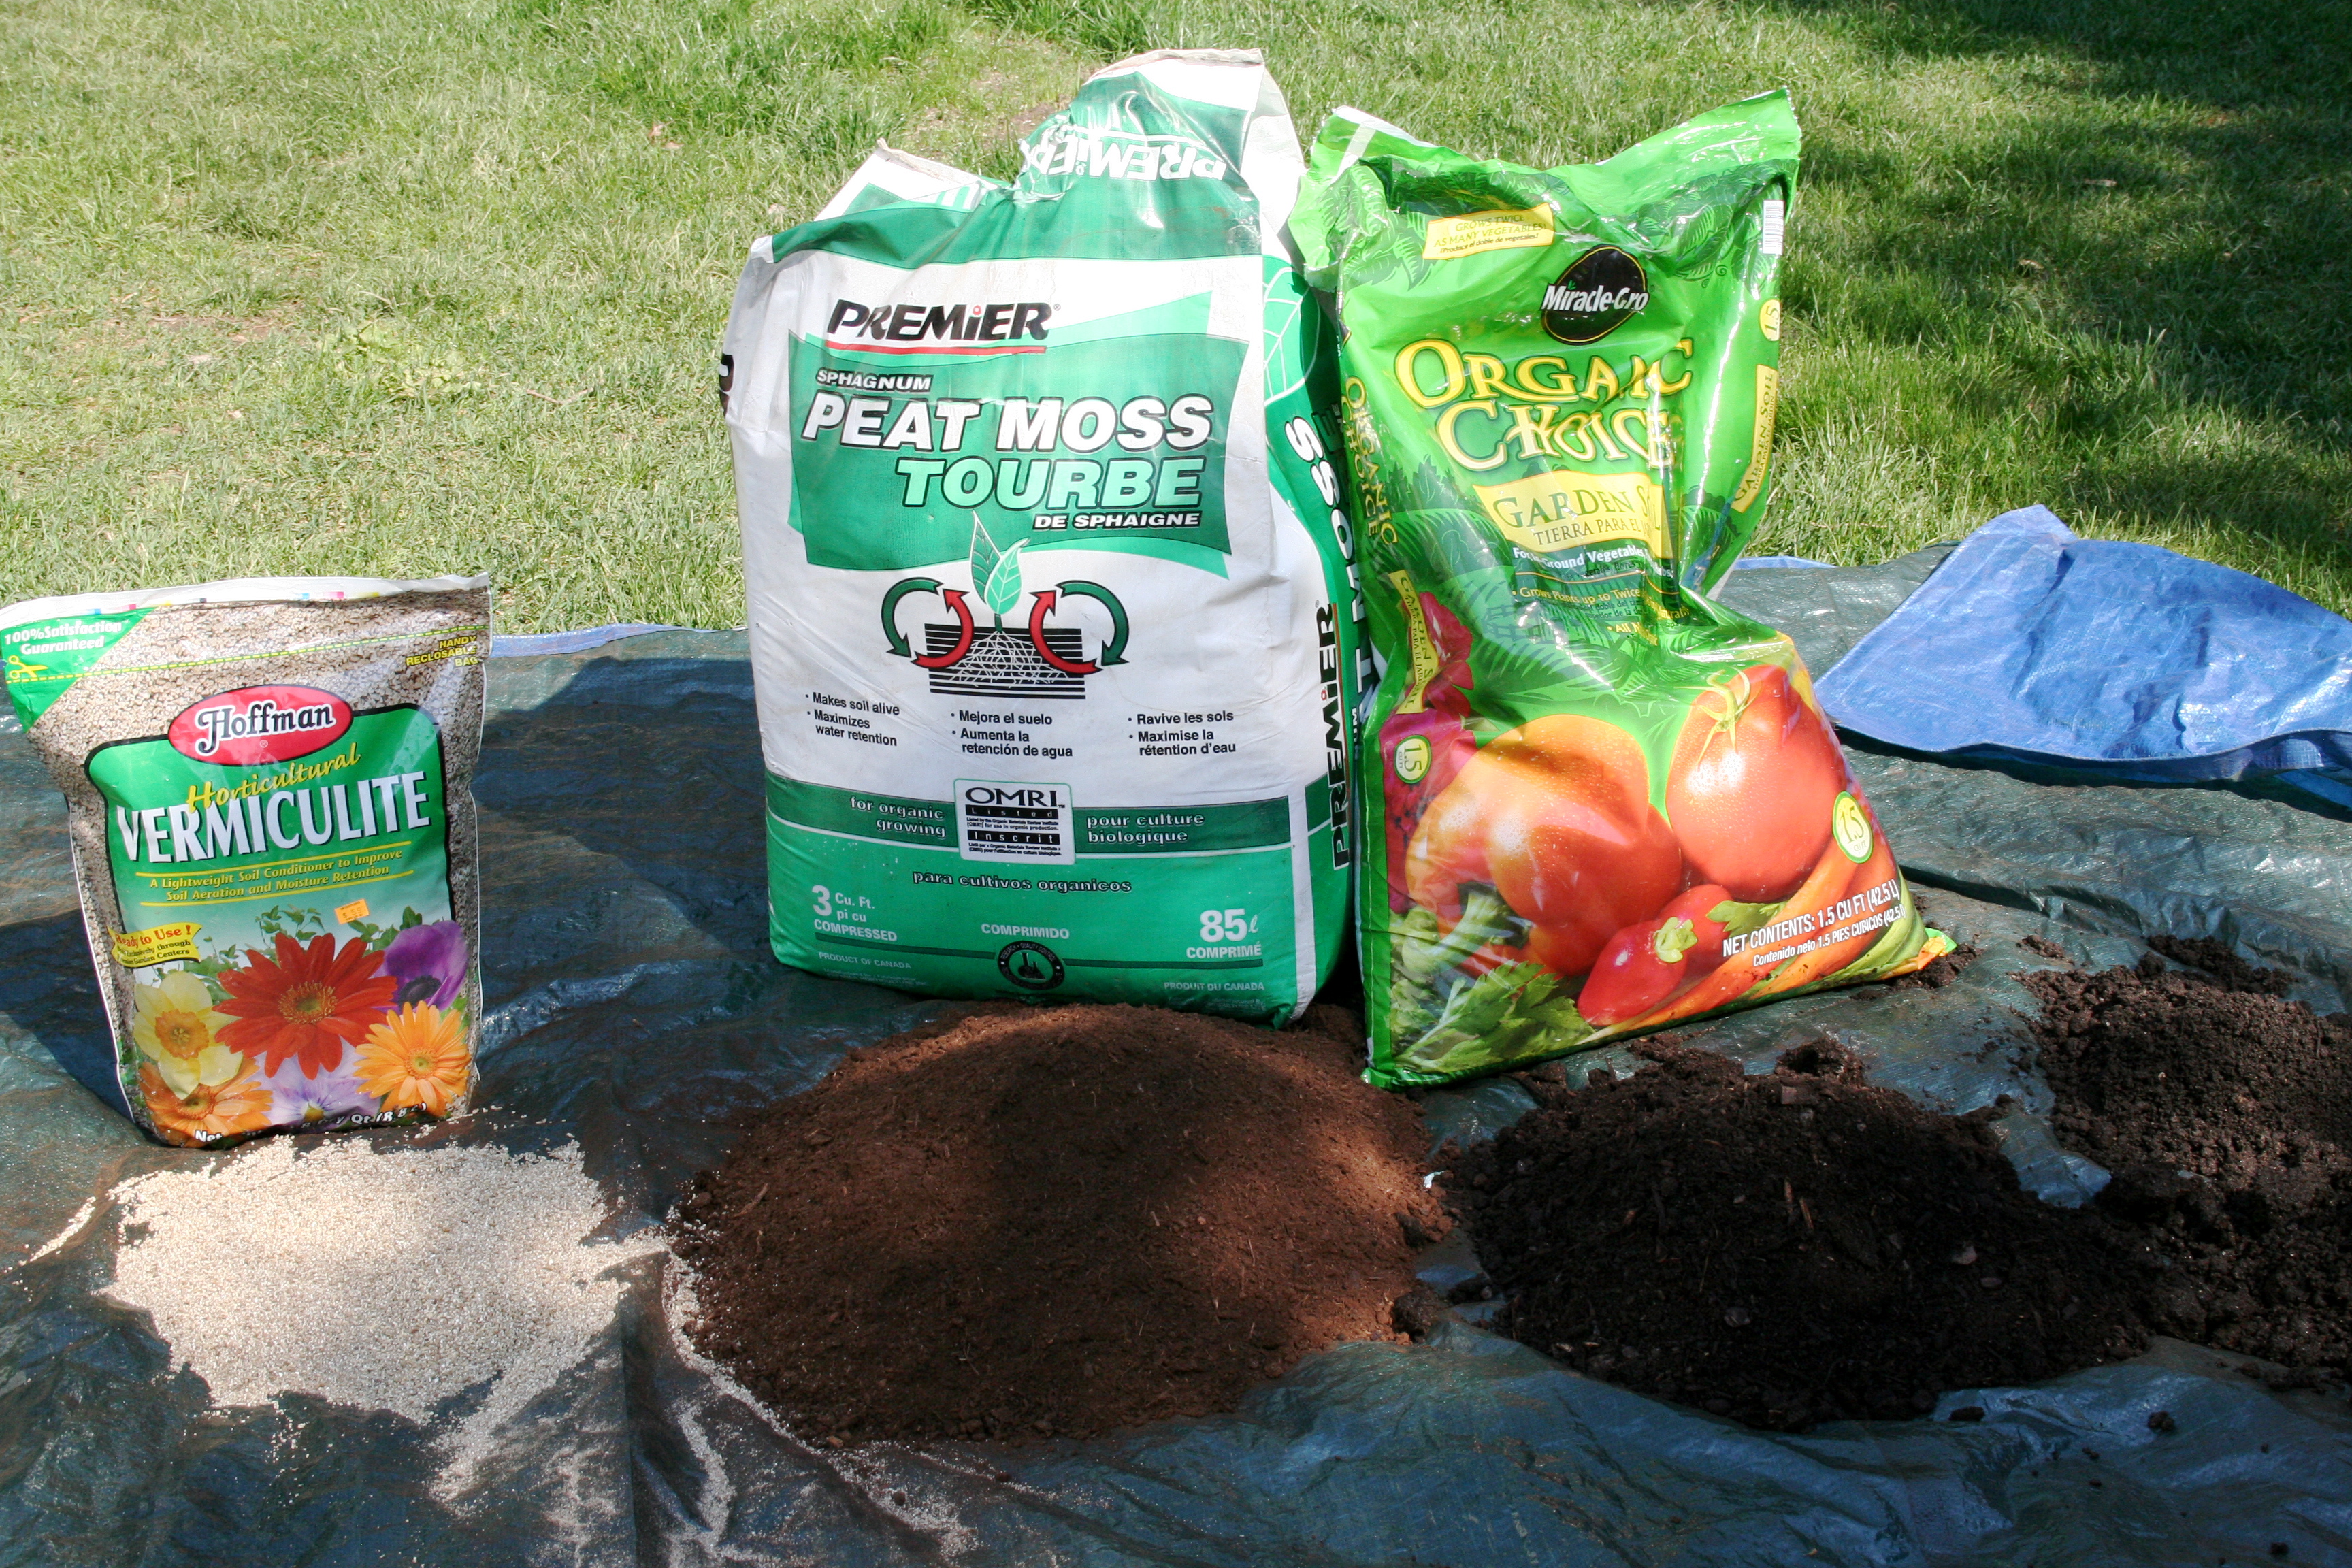
Girls22 048Here is the dirt on the dirt! I basically tried to follow Mel’s famous mix. Although it was pretty hard to track down, I think I managed to make it work. He calls for 1/3 vermiculite, 1/3 peat moss, and 1/3 compost (from 5 different sources).   He states that if you use this mix that there is no need for weeding and fertilizing! Well that sounds exciting and easy right! I hope so…………….

Since my bed is not a perfect 4 x 4, it’s 8 x 3 (more like 2 3/4) and 12 inches tall, we had a hard time figuring out exactly how much soil to buy or how much we would need. It doesn’t help that each bag of ingredients is measured in a completely different way.  I found that after I did my initial estimation that I had to keep running back for more.  Let’s just say that math is not my forte………but even then I managed to make it work.

Although I lost my very detailed note of exactly what I used, here is what stands out in my memory.

  • Vermiculite–2 bags of 18 dry qt
  • Spaghmum Peat Moss–1 Bag–3 cubic feet
  • Organic Garden Soil–4 Bags–1.5 cubic feet each
  • Compost–
  • Long Island Compost–Compost Manure–1 Bag–1 cubic feet
  • Long Island Premium Compost–(Grass, Leaves, Veggie, Fruit)–2 Bags–1 cubic feet each
  • Dehydrated Cow Manure–1 Bag–1 cubic feet
  • Scott’s Humus & Manure–4 Bags–1 cubic feet each

I know the mix didn’t call for Garden Soil but that’s where my paranoia kicked in and I thought….just to be safe….I would add some garden soil in to make sure all my bases were covered.  Hopefully it will work!
Girls22 048

Girls22 049

I was also doing all of the mixing and preparation myself. I was using up my “lunch break” (when the kiddies are napping) to get my garden prepped. I wanted the soil to sit for at least 2 weeks before my initial planting.  There was no way I was going to be able to mix all of the soil at once, it would have been way to heavy.  Since I wasn’t sure if I had enough of each I decided to mix in batches so that I knew I was still getting a 1/3 of each item. Mel’s brilliant idea is to mix on some sort of tarp and once completely mixed transfer to the bed! It worked great!

Girls22 054

After about 16 times I finally got enough to fill the bed! It was only after that I realized that because my bed was so tall I really didn’t need to add that much mix to the whole bed. According to Mel, you really only need 6 ” of good soil. After the sand and topsoil, I would say that I have about 10 inches of good soil!  I could have saved a ton of money. Live and learn.

Girls22 051

Sophie

Check out My New 30’s Post on Dirt…..very resourceful!

Next time……..what to plant and where!

SHARE TO FACEBOOK//TWEET THIS//SHARE TO PINTEREST

Girls22 046First thing on the to do list for my new veggie garden was to build the raised bed. Mel, from the All New Square Foot Garden Book, generally uses 4×4 square foot raised beds but we decided to go a different route. We were not ready to give up any grass space to dedicate to the bed so we thought we would try to find an existing flower bed that we could convert.

I had to follow the sun, the elements, and other factors in my backyard to decide where to put the new bed. I thought there was a good spot right in the back of my house against the house wall but after careful consideration, I think it’s a bit too shady.  I am thinking that I might eventually make this a cold weather bed.

Girls22 024

After more tracking I decided the perfect spot would be around the corner on the side of the house; sun all day long!!

Girls22 020

For materials, we decided that we would use cedar wood. It’s untreated and the most natural way to go for my new veggies.  Overall the cost of the materials for the main bed was $85.00. My hubby got on his “honey do” hat and started to build.

Overall dimensions of the bed were 8 x 3, not quite a square foot bed, but we would make it work.  We used 1 x6 size cedar and doubled it up to give me a 12″ tall bed. We used 1 x 1 cedar for the legs and attached it to all 4 corners.

Girls22 027

“Honey do” cut these at an angle to make them stake into the ground easier.

Girls22 032

Girls22 034

We also added chicken wire to the bottom to help prevent any little pests from digging up underneath and eating my plants. After more analysis, I would have done this differently, I would have put down the weed cloth, recommended by Mel.

Girls22 039

Finally the raised bed is complete, it really took no time at all!  We cleared the old dirt, staked in the new bed, leveled it off. I then added some sand (helps in drainage) and some organic top soil to fill the gap. I will give a detailed look at the bed full of new soil in my next blog post.

Girls22 046

3 excellent resources on building rasied beds besides Mel’s Book are:

Sunset Magazine

My New 30

Erin Covert * Hands On

SHARE TO FACEBOOK//TWEET THIS//SHARE TO PINTEREST

Garden 2009 013Okay I’ve done it now, I went ahead and added a new hobby onto my already long and eclectic list–Vegetable Gardening! This is something I have wanted to do for a long time. Initially I was going to take the plunge this year and just start off with an herb garden but we recently fenced in our backyard and I decided to go for it. Let the adventures begin!  I thought that along with my normal weekly blogs (cough, cough–hey I have 2 kids right?!), I will also try to do a weekly update on the new veggie garden.  2 blogs per week, now that’s an adventure in itself, hey I said I would try right? I will probably post a bit more in the next couple of weeks just to play a little catch up!

After combing through the internet and through several books on gardening, I settled on what I found was a perfect fit for my personality and style.  The Raised Bed–Square Foot Garden by Mel Bartholomew. Or as my mom puts it — ” The Anal Garden”. Very funny mom!  Although I have been using the actual book as a resource I initially discovered this way of gardening through many resourceful and very helpful gardening blogs, which I will be sure to credit as I document my new adventure! I hope you enjoy the new garden as much as I am and I would love to hear about other gardens and what you are doing!

SHARE TO FACEBOOK//TWEET THIS//SHARE TO PINTEREST

SherryWell the Toddler Art Studio is in full use! I have hosted a few Art Groups but mainly have spent time getting acclimated with  Big Sis M and Lil S. M really loves to be in there and often tugs on my arm and says, “Come Mama, paint!” I love that she is enjoying it!  Lil S loves it too, although she mainly just loves finding things she can chew on!

We recently did a few fun things in the studio. First we decided to try a fun project/technique which I learned about from my favorite Art Blog. We did Spin Art.  It’s basically an easy and fun project using Tempera Paint and a Salad Spinner. We cut out heart shapes and other odd shapes in paper and then we had the toddlers squeeze in a bit of each color paint. Once they were done picking their paint colors then they pushed on the salad spinner and made it spin. Of course, their favorite part was hitting the stop button!

Here is a picture of my friend’s daughter, enjoying Spin Art. (She was my most loyal student!)  She loved it so much she made 3 of them!!

Sherry

Here is a view of them drying. I will definitely use thicker paper next time or paper plates as recommended by The Artful Parent.  The thin paper moved around a bit.

Sherry

Here is a picture of the finished product, I popped the color a bit with some fun construction paper!

Sherry

Another day in the Studio. I picked up Mary Ann Kohl’s, Art Experiences for Toddler’s and Two’s also recommended by The Artful Parent. There are so many great and fun ideas in this book.  The book’s philosophy is pretty simple, it’s the process not the product! I love this concept, certainly perfect for my 1 and 2 y.o. olds! Today we decided to try and do a bit of exploring. She recommends that you just put out a list of items: tools, markers, collage items and then let the toddler’s explore. Although we have pretty much been doing this, M has free reign of the markers, glues, crayons, etc. (Always with adult supervision).  I decided to try and add a few more: glitter glue, pom poms, scrap paper, scissors, chalk, etc.

Sherry

Sherry

I am glad we are sticking with the philosophy of PROCESS and not PRODUCT!

Sherry

She had a blast and I look forward to letting her explore with more fun things!!  Thanks again Jean for the inspiration!

SHARE TO FACEBOOK//TWEET THIS//SHARE TO PINTEREST